Tuesday, December 21, 2010

Peanut Brittle

DSC_1050

I have to admit I do not have much patience.  Candy making has taught me not to rush and keep your eye on the pot.  This is the best peanut brittle I have ever tasted!!  I had to make 3 batches!!!  Everyone keeps asking for more.  Here are a few tips I learned while making this a few times.  One, I added the peanuts as soon as the sugar mixture started to boil if you do this---keep stirring!! Otherwise, the peanuts will brown fast and burn.  Or you can add the peanuts when the temperature reaches 250 degrees F.  Two, I would double the recipe but do not be tempted to do more than that.  It will become hard to stir.  Third, have all of your ingredients ready.  You won’t have time to measure.  Last, do not rush this process and make sure it reaches the hard crack stage. 

DSC_1049


Original Recipe Yield 1 pound

Ingredients
  • 1 cup white sugar
  • 1/2 cup light corn syrup
  • 1/4 teaspoon salt
  • 1/4 cup water
  • 1 cup peanuts
  • 2 tablespoons butter, softened
  • 1 teaspoon baking soda
Directions
  1. Grease a large cookie sheet. Set aside.
  2. In a heavy 2 quart saucepan, over medium heat, bring to a boil sugar, corn syrup, salt, and water. Stir until sugar is dissolved. Stir in peanuts. Set candy thermometer in place, and continue cooking. Stir frequently until temperature reaches 300 degrees F (150 degrees C), or until a small amount of mixture dropped into very cold water separates into hard and brittle threads.
  3. Remove from heat; immediately stir in butter and baking soda; pour at once onto cookie sheet. With 2 forks, lift and pull peanut mixture into rectangle about 14x12 inches; cool. Snap candy into pieces.

adapted from allrecipes.com (mom’s best peanut recipe)

Oreo Brownies

I found this awesome food blog.  Go to www.picky-palate.com you won’t be disappointed.  This woman is a genius!

She took these ingredients:

DSC_1052

and turned them into this…

DSC_1056

she committed the ultimate sin…..Oreo cookies dipped in brownie batter!!!  SUPER DELICIOUS!!!  Check out her blog for this recipe and more!

Chocolate-Topped Sea Salt Caramels

It’s that time of year again….

DSC_1062
Ingredients:
1 cup butter (do not use margarine)
2-1/2 cups packed brown sugar (1 lb.)
1-1/2 tsp. coarse sea salt
1 cup light corn syrup
1 can (14 oz.) sweetened condensed milk (not evaporated)
1 tsp. vanilla
1/2 cup semisweet chocolate chips
1/2 tsp. vegetable oil

  • Line bottom and sides of 11x7-inch pan with foil, leaving 1 inch of foil overhanging at 2 opposite sides of pan; grease foil with butter.
  • In a 3 qt heavy saucepan, melt 1 cup butter over medium heat.  Stir in brown sugar, 1/2 tsp. of salt, corn syrup and milk.  Cook over medium heat, stirring constantly, until mixture begins to boil.
  • Reduce heat to medium-low.  Cook 40 to 50 minutes or until 248 degrees F on candy thermometer (firm-ball stage).  Remove from heat; stir in vanilla.  Pour into pan.  Refrigerate about 1 hour or until completely cooked.
  • In a small microwavable bowl, microwave chocolate chips and oil on High 30 to 40 seconds; stirring every 10 seconds, until chocolate is melted.  Using spatula, spread chocolate evenly over caramel layer.  Sprinkle with remaining 1 tsp. salt.  Refrigerate about 30 minutes or until chocolate is set.
  • Using foil handles, remove caramels from pan to cutting board; peel back foil.  Cut into 8 rows by 6 rows.  Store at room temperature.
  • Servings: 48 Caramels
adapted from betty crocker holiday baking pg 103

Sunday, October 24, 2010

Click to play this Smilebox slideshow
Create your own slideshow - Powered by Smilebox
A free slideshow by Smilebox

Anonville Manor Dinner Mystery Party

Jaime Bond (Secret FBI Agent)

I have always wanted to host a mystery dinner party.  This year for our annual Halloween Party we were able to thanks to our friends who were eager to participate.  We hosted our party at my parent’s lake house which comfortably seated all 17 of us to a sit down dinner. 

I went to www.mymysteryparty.com and chose a party that was perfect for our group.  The game is played in three rounds of cocktail and appetizers, dinner, coffee and dessert.    Everyone was handed envelopes at the beginning of each round that instructs the characters what to do and say (there is a lot of improv).  The party was a success thanks to our friends who really got into their characters.  For example,our friend Marshall was Mayor Paul A. Tisshon he drove up with a sign on his car saying “Re-Elect Paul A Tisshon “ and handed out buttons for all of us to wear.  My husband played the part of a narcissist butcher much to well.  Good Times!!  I highly suggest this website.  They were quick to respond to my emails and very helpful.  They have mystery games for all ages and holidays.  Then even have scavenger hunts---maybe next year! 

Here are a few pictures from that evening.  For appetizers I served shrimp cocktails.  I went to the dollar store and purchased champagne glasses. I filled the bottom of the glass with crushed ice and topped it off with shrimp cocktail sauce.  Dinner was half of a Cornish hen with wild rice and steamed green beans. Dessert was Crème brulee ( will post recipe at a later time). 

DSC_0989    DSC_0990 DSC_0991 DSC_0992 DSC_0993 DSC_0994DSC_0995

DSC_0996DSC_0997 DSC_0998DSC_0999DSC_1007DSC_1008

DSC_1006DSC_1004DSC_1009DSC_1002


Sunday, October 3, 2010

Old-Fashioned Yellow Cake for Two


For those of you who have been following this blog awhile know that my husband does not like sweets.  I do!  I was craving yellow cake with simple chocolate icing but I didn’t want a large batch of cupcakes or cake.  I came across this cookbook a few years ago “Small-Batch Baking”.  Perfect!  Cake just for me!

Unsalted butter, at room temperature
1/2 cup all-purpose flour, sifted
3 Tbs.  buttermilk
1/8 tsp. baking soda
Yolk of 1 large egg
1/2 tsp. pure vanilla extract
3 Tbs. unsalted butter, melted and cooled
1/3 cup sugar
1/4 tsp. salt

Pans Required:
Two 14-or 14.5 ounce cans or small pan (I used a small wilton heart shape pan)
1 baking sheet


  • Place a rack in the center of the oven and preheat the oven to 350 degrees F.

  • Grease the insides of the cans and lightly dust them with flour, tapping out the excess.  Place the cans on a baking sheet for easier handling, and set aside.

  • place the buttermilk and baking soda in a small bowl, and whisk until the baking soda is dissolved.  Add the egg yolk, vanilla, and melted butter, and whisk to combine.

  • Place the flour, sugar, and salt in a medium-size mixing bowl and whisk to blend well.  Add the buttermilk mixture and whisk just until blended and smooth.

  • Spoon the batter into the prepared pan(s) .  Bake the cakes until a toothpick inserted into the center of one comes out clean, about 25 minutes. 

  • Remove the baking sheet from the oven and transfer the cans to a wire rack to cool for 15 minutes.  Then run a thin, sharp knife around the edge of each can, and invert them to release the cakes.  Place the cakes upright on the rack and let them cool completely.  (The unfrosted cakes can be stored in an airtight container in the refrigerator for up to 2 days; or they can be frozen, well wrapped, for up to 1 month.  Let them return to room temperature before frosting.)

  • Frost!!!
I used Betty Crockers Whipped Chocolate frosting.  I normally am not a big fan of frosting but this I could of ate the whole can!!


Tuesday, September 28, 2010

Paula's Shrimp and Creamy Chedder Grits

Hello everyone!  It’s hard to believe it has been this long since my last post.  Time sure does fly I can’t believe its fall!!  I love this time of year of course here in Tennessee we really don’t get fall like weather until next month. 

I know what you are probably thinking Shrimp and Grits?!! Have you lost your mind?  Not if you live in the South!
 My husband and I just celebrated our wedding anniversary (Sept 18th) and we went to one of our favorite quick getaway places...The Great Smoky Mountains in Gatlinburg, TN.  It is absolutely gorgeous in the fall.  This dish sort of reminded me of that.  Fall colors and white smoky fog.  I stopped at the Old Mill (http://www.old-mill.com/) for some stone ground grits and could not wait to get home to try them.  Some of you might be wondering what are grits?  It coarsely ground corn and it is often served with eggs and bacon in the morning a traditional meal in the South.  For some of you it is like porridge, malto meal or cream of wheat.  Grits is similar in texture to Cream of Wheat (which is made from ground wheat).  Hey don’t knock it until you try it!  It was delicious.

Makes 4 servings
6 slices of applewood-smoked bacon, chopped
1/2 cup diced red bell peppers
1/2 cup diced yellow bell pepper
2 cloves garlic, minced
1 Tbs. Creole seasoning
1/2 cup dry white wine
1 lb. large fresh shrimp, peeled and deveined
1 Tbs. fresh lemon juice
2 Tbs. minced fresh chives
Creamy Cheddar Grits (recipe follows)
Thinly sliced chives (optional)


  • In a large skillet, cook bacon over medium heat until crisp.  Using a slotted spoon, remove bacon from pan, and drain on paper towels.  Reserve 2 tablespoons bacon drippings in skillet.  Add peppers, garlic, and Creole seasoning; cook for 2 minutes, stirring frequently.  Add wine, and cook for 2 minutes.  Increase heat to medium-high.  Add shrimp, and cook, stirring occasionally, for 1 to 2 minutes or until shrimp are pink and firm.  Remove from heat; stir in lemon juice and minced chives.

  • Serve shrimp mixture over Creamy Cheddar grits. Sprinkle evenly with bacon, and sprinkle with thinly sliced fresh chives.  serve immediately.

Creamy Cheddar Grits
1 (32-ounce) carton reduced-sodium chicken broth
1 cup water
1 cup stone-ground white grits
1 cup half-and-half
1-1/2 cups shredded extra-sharp white Cheddar cheese
3 Tbs. butter
1/4 tsp. ground white pepper

In a medium saucepan, combine chicken broth and 1 cup water; bring to a boil over medium -high heat.  add grits, stirring until combined.  Return to a boil; reduce heat, and simmer, stirring frequently, for 1 hour.  Stir in half-and-half; cook for 45 minutes, stirring frequently, or until thickened.  Remove from heat, and stir in cheese, butter and white pepper, stirring until cheese is melted.

Courtesy of cooking with pauls deen magazine september/october 2010

Saturday, August 21, 2010

Cherry Cobbler

I usually like to eat my fruits fresh and not baked in anything....BUT...Wal-Mart had a sale on these delicious beauties a $1.00 a pound.  Yes, I went overboard and had plenty of left over cherries and I could not see them going bad.  So I made cherry cobbler courtesy of Emeril Lagasse.  It was a very simple recipe except I did NOT have a cherry pitter (hint hint family that would be a great stocking stuffer) .  It took me longer to pit them than to make this cobbler and not to mention it stained my fingers and nails for a week!!  It was worth it....served with vanilla bean ice cream....hmmmm....I love the combination of warm and cold.


--Serves:

6 Servings.
Ingredients
Filling:
•6 cups tart red cherries, pitted
•1 1/4 cups sugar
•1/4 cup water
•4 teaspoons cornstarch

Topping:
•1 cup flour
•1/4 cup sugar
•2 tablespoons brown sugar
•1 teaspoon baking powder
•1/2 teaspoon cinnamon
•3 tablespoons butter
•1 egg, beaten
•3 tablespoons milk

Directions
Preheat oven to 400 degrees F. In a saucepan combine filling ingredients and cook, stirring until bubbling and thickened. Pour into an 8-inch square baking dish. Meanwhile, stir together flour, sugars, baking powder, and cinnamon. Cut in butter until it is crumbly. Mix together egg and milk. Add to flour mixture and stir with a fork just until combined. Drop topping by tablespoonfuls onto filling. Bake for 25 minutes until browned and bubbly.


Friday, July 23, 2010

Chocolate Malted Cookies

Sometimes I like receiving junk mail.  Let me explain I preview a lot of cookbooks and they send me all sorts of offers...some are tempting others I send back.  I found this recipe on one of those flyer's you know which one I am talking about....the one that is a little blurred with size 2 font?  Well, I am a master optician....
Anyways, you have to make these !!  Right now!  I made the dough one evening and put the dough in the refrigerator and made them several days later.  Oh my goodness, they were just delicious....they hit the spot. 
The recipe calls for semisweet chocolate and milk chocolate but I thought the dough would be sweet enough so I went BOLD and used bittersweet chocolate.  HEAVEN....I'm Amazing....uhmmm...I mean the cookies were just AMAZING!!  ;)

Ingredients:
1 cup butter-flavor shortening
1-1/4 cups packed brown sugar
1/2 cup malted milk powder ( I used ovaltine)
2 TBS  chocolate syrup
1 TBS vanilla extract
1 egg
2 cups all-purpose flour
1 tsp baking soda
1/2 tsp salt
1-1/2 cups semisweet chocolate chunks
1 cup milk chocolate chips 
( I omitted both kinds of chocolate chips and used Ghiradelli 60% cacao bittersweet chocolate)

* In a large bowl, beat the shortening, brown sugar, malted milk powder, chocolate syrup and vanilla for 2 minutes.  Add egg.
*Combine the flour, baking soda and salt; gradually add to creamed mixture, mixing well after each addition.  Stir in chocolate chunks and chips.
*Shape into 2-in balls; place 3 in apart on ungreased baking sheets.  Bake at 375 degrees for 12-14 minutes or until golden (mine only took 10 minutes).  Cool for 2 minutes before removing to a wire rack.

Prep/total time: 30 min  Yield:  about 1-1/2 dozen.

**recipe adapted by Taste of Home Grand Prize Winners mail flyer recipe submitted by Teri Rasey of Cadillac, Michigan.

Wednesday, June 9, 2010

PURPLE Potatoes

Back to the Kitchen….

It’s been awhile. I can’t believe it we are in JUNE!! Where does the time go? Well my husband and I just returned from our annual vacation to San Francisco. If you have been following this blog awhile you will know that we LOVE San Francisco! Love like if we won the lottery we would move there!! This time was very special we had three of our friends visit with us. It was a blast! I can’t wait to share some of our pictures (waiting on hubby)....

We went to the Farmer’s Market on Tuesday and I wish I could buy all of the veggies and fruit! They had beautiful baby artichokes, purple bell peppers, PURPLE potatoes….yup…I did ….had to buy them and yes I packed them in my suitcase and guess what’s for dinner tonight? (My friends already think I’m nuts)

My purple potatoes....


Tilapia with Purple Potato Crust and Chive Rosemary Oil
Ingredients
•4 (4- to 6-ounce) tilapia fillets
•8 to 12 ounces purple potatoes, peeled and very thinly sliced
•1 tablespoon fresh minced rosemary leaves, plus 1 tablespoon
•2 tablespoons olive oil
•2 tablespoons butter
•1/2 cup extra-virgin olive oil
•1/3 cup minced fresh chives
•1/2 teaspoon salt
•1/4 teaspoon freshly ground black pepper
Directions
Preheat the oven to 375 degrees F.
Place the fish fillets on a work surface and season with salt and pepper. Top each of the fillets with enough slices of potato to completely cover the surface of the fish, overlaying the potatoes like shingles. Sprinkle the potatoes with a bit more salt and pepper, and the 1 tablespoon rosemary leaves.
Heat a large, oven-proof skillet over medium-high heat. Add the olive oil and the butter. When the butter is melted and the oil is hot add the fish, potato side down. Place the skillet in the oven and bake until the fish is cooked through, about 15 to 17 minutes.
Meanwhile, combine the extra-virgin olive oil, chives, the remaining 1 tablespoon rosemary, salt and pepper in a small bowl.
To serve, place the fish on serving plates, potato side up. Drizzle the fish and the plate with the chive oil. Serve immediately.
**Adapted from Giada De Laurentiis  **I found it difficult to layer the potatoes on the fish first then turn in upside down on the pan.  I layered it on the pan first then layed the fish on top.

AND BECAUSE.....I had left over potatoes.....how about??
Rosemary Roasted Purple Potatoes


5-6 medium-sized purple or other potatoes
3 tablespoons extra virgin olive oil
1 clove garlic, crushed
1 1/2 teaspoons dried rosemary, crushed
Kosher salt and freshly ground pepper to taste
Preheat oven to 375 degrees.
Scrub the potatoes well. Dry and quarter them as shown above.
Place potatoes in baking pan to form a single layer.
Drizzle olive oil over potatoes, sprinkle with crushed garlic, rosemary, salt and pepper. Toss potatoes to coat with oil and spices.
Cover pan with foil and slide into oven.
Bake potatoes for 15 minutes.
Slide pan from oven and remove foil. Using a spatula, turn potatoes over.
Return pan to oven without foil and roast potatoes another 15 minutes.
Slide potatoes from oven, turn them one more time and continue roasting another 10-15 minutes. Remove from oven and serve immediately.
Serves 6.
**courtesy of copywriterskitchen.com

Sunday, May 2, 2010

Gyro Meat with Tzatziki Sauce


My mother has made this recipe using lamb, chicken, and turkey ground meat. Our favorite was ground chicken…but of course when I went grocery shopping they were out and so I used ground turkey. I was really craving gyros. Dinner came out well but my husband wasn’t too crazy about the turkey meat. I loved the tzatziki sauce. I made it using Greek yogurt so I omitted the part where you had to strain the yogurt. If you have ever had Greek yogurt it is delicious and you will never go back to regular yogurt again! It is so rich, smooth and creamy.

Gyro Meat with Tzatziki Sauce
Recipe courtesy Alton Brown, 2005

Ingredients
•1 medium onion, finely chopped or shredded
•2 pounds ground lamb
•1 tablespoon finely minced garlic
•1 tablespoon dried marjoram
•1 tablespoon dried ground rosemary
•2 teaspoons kosher salt
•1/2 teaspoon freshly ground black pepper

•Tzatziki Sauce, recipe follows
Directions
Process the onion in a food processor for 10 to 15 seconds and turn out into the center of a tea towel. Gather up the ends of the towel and squeeze until almost all of the juice is removed. Discard juice.
Return the onion to the food processor and add the lamb, garlic, marjoram, rosemary, salt, and pepper andprocess until it is a fine paste, approximately 1 minute. Stop the processor as needed to scrape down sides of bowl.
To cook in the oven as a meatloaf, proceed as follows:

Preheat the oven to 325 degrees F.
Place the mixture into a loaf pan, making sure to press into the sides of the pan. Place the loaf pan into a water bath and bake for 60 to 75 minutes or until the mixture reaches 165 to 170 degrees F. Remove from the oven and drain off any fat. Place the loaf pan on a cooling rack and place a brick wrapped in aluminum foil directly on the surface of the meat and allow to sit for 15 to 20 minutes, until the internal temperature reaches 175 degrees F. Slice and serve on pita bread with tzatziki sauce, chopped onion, tomatoes and feta cheese.

Tzatziki Sauce:
16 ounces plain yogurt
1 medium cucumber, peeled, seeded, and finely chopped
Pinch kosher salt
4 cloves garlic, finely minced
1 tablespoon olive oil
2 teaspoons red wine vinegar
5 to 6 mint leaves, finely minced
Place the yogurt in a tea towel, gather up the edges, suspend over a bowl, and drain for 2 hours in the refrigerator.

Place the chopped cucumber in a tea towel and squeeze to remove the liquid; discard liquid. In a medium mixing bowl, combine the drained yogurt, cucumber, salt, garlic, olive oil, vinegar, and mint. Serve as a sauce for gyros. Store in the refrigerator in an airtight container for up to a week.
Yield: 1 1/2 cups

Wednesday, April 7, 2010

Fast Family Fajitas


I hope everyone had a wonderful Easter. The weather here in Tennessee was beautiful it was 80 degrees. We couldn’t have asked for a better day it was fun watching the kids do their egg hunt.
My husband and I have been so busy lately I was trying to find something quick and easy to make for dinner. I came across this recipe from one of many pampered chef parties I have attended.
Most everyone will have these ingredients stocked in their kitchens. Try it tonight it only takes minutes!

Ingredients:
1 medium green bell pepper
1 medium red bell pepper
4 boneless, skinless chicken breast halves
2 teaspoons vegetable oil, divided
1 garlic clove, pressed
1 envelope Lipton Recipe Secrets Onion Soup mix
½ cup water
½ cup salsa
12 (7-8 inch) flour tortillas, warmed
Toppings of your choice

• Cut bell peppers into ½ -inch strips. Cut chicken crosswise into thin strips.
• Heat skillet over medium-high heat. Add 1 teaspoon of the oil and chicken.
  Stir-fry 3-4 minutes or until chicken is no longer pink. Remove from skillet;
   Set aside. Add remaining oil, bell peppers, and garlic; stir-fry 1-2 minutes or
   Until vegetables are crisp-tender.
• Add chicken, soup mix, water and salsa to bell pepper mixture. Cook and stir
   2-3 minutes or until heated through.
* To serve, place chicken mixture in center of tortillas. Serve with toppings, if desired.

Yield: 6 servings


**adapted from Pampered chef season fall/winter 2003

Friday, March 26, 2010

Cupcake flavored Pebbles rice krispie treat

My colleague was having a birthday and every one wanted something different……so I thought who in this world doesn’t love rice krispie treats! I know…right! I was walking down the cereal isle and I found cupcake flavored pebbles!! Yummy. I had the most brilliant idea ever (only later to find out I wasn’t the only one, darn) make rice krispie treats into cupcakes….get it? Cupcake flavored cupcakes?? How clever you may say…well…they thought so! LOL!!

Ingredients:
3 tablespoons butter or margarine
1 package (10 oz., about 40) regular marshmallows
- OR -
4 cups miniature marshmallows
whole box of Cupcake Pebbles

1. In large saucepan melt butter over low heat. Add marshmallows and stir until completely melted. Remove from heat.
2. Add  cereal. Stir until well coated.
3. Coat muffin tins with cooking spray and put cereal marshmallow mixture in muffin cups.  After cooled decorate as you would cupcakes.

Wednesday, March 17, 2010

Spinach-Mushroom Quesadilla

My husband and I have a favorite Mexican restaurant that we frequent at least once a week it called Torero's. They are the best people and the best food in town hands down! I can’t tell you what my favorite there is I LOVE IT ALL!!! Especially the margaritas and fried cheesecake! They don’t even hand us a menu and we have our usual booth and they always know what we want to order. How AWESOME is that! Anyways…yes I was dreaming of margaritas and lost my train of thought. When I want something light I order their Baja Quesadilla (spinach, shrimp, mushrooms, cheese) it is PERFECT! Well, the other evening I was craving spinach, mushrooms, and shrimp. We live out in the county so when your home your home no quick drive to the city. I found a recipe for spinach-mushroom quesadilla in my inbox courtesy of Martha Stewart.   It tasted great but I will leave the quesadilla making to Torero's

Ingredients


Serves 4

2 tablespoons canola oil

2 medium red onions, thinly sliced

8 ounces (2 1/4 cups) button or cremini mushrooms, thinly sliced

6 ounces (about 8 cups) prewashed spinach, shredded

Coarse salt and ground pepper

8 flour tortillas (8-inch)

8 ounces (2 cups) pepper Jack cheese, shredded

Directions

1.Preheat oven to 400 degrees. In a 12-inch skillet over medium heat, warm 1 tablespoon oil. Cook the onions, stirring occasionally, until lightly golden, about 5 minutes. Add the mushrooms; cook, stirring occasionally, until they're tender, 6 to 8 minutes.

2.Add spinach in two batches, letting the first batch wilt slightly before adding the next; cook until spinach is completely wilted and mixture is dry, 2 to 3 minutes total. Season with salt and pepper.

3.Brush one side of tortillas with remaining tablespoon oil. Place 4 tortillas, oiled sides down, on two baking sheets. Layer each tortilla with cheese, spinach mixture, and more cheese, dividing evenly. Top with the remaining 4 tortillas, oiled sides up, and lightly press to seal.

4.Bake until cheese has melted and tortillas are golden brown, turning them once, about 10 minutes. To serve, cut quesadillas into quarters.

From Everyday Food, March 2004
 
**If you are ever in the area don't miss Torero's Fine Mexican Food located 2088 Lowe's Dr Clarksville, TN 37040

Tuesday, March 2, 2010

Bourbon Chicken

I know I’m a little late posting this but we had a Mardi Gras party last month and it was an absolute blast. I have been to New Orleans a few times and there is always a party to be had. I wanted to make something different other than your traditional red beans and rice and dirty rice, my favorite. I came across Woman’s World magazine while I was waiting in line at the grocery store and they had a Mardi Gras dinner menu. Perfect!!! The chicken was so tender and juicy my mouth is watering just thinking about it.


Ingredients:
1-1/4cups bourbon whisky
1 cup packed light brown sugar
4 cloves garlic, minced
1/2 cup salt
1 roasting chicken, 6-7lbs
4 onions, cut into 8 wedges each
2 heads garlic, top 1/3 cut off
1 TBSP olive oil
1 tsp. dried majoram ( I used oregano)
1/4 tsp. pepper
1/2 cup apple jelly

Directions:

  • In large, deep pot, combine 1 qt. water with 1 cup whisky, sugar, minced garlic and salt.  Add chicken to mixture.  Cover; refrigerate at least 4 hours or up to 8 hours.

  • Preheat oven to 350 degrees F.  In a large roasting pan, toss together onions, garlic heads,oil and 1/4 tsp. marjoram and 1/8tsp pepper. Push mixture to sides of pan.

  • Drain chicken, discarding marinade.  Pat chicken dry with paper towels.  Place in center of roasting pan so that it is surrounded by onion mixture.  Sprinkle chicken with remaining 3/4tsp majoram and 1/8tsp pepper.  Roast until meat thermometer inserted into thickest part of thigh registers 180 degrees F, about 1 hour, 40 minutes.

  • Meanwhile, in small ot over medium-high heat, bring apple jelly and remaining 1/4 cup whisky to boil.  Reduce heat to medium low; simmer until thickened and reduced to 1/3 cup, about 10 minutes.  Brush glaze over chicken during last 10 minutes of cooking time. 


Happy Mardi Gras!

Sunday, February 14, 2010

Pioneer Woman's Cinnamon Rolls

 
I have been craving cinnamon rolls for two weeks now. It would have been so easy to buy a can of Pillsbury or go to the Wal-mart Bakery but I resisted instant gratification and made my own. Honestly, I could not wait to make something out of my new cookbook (The Pioneer Woman Cooks by Ree Drummond pgs 36-39) my wonderful hubby gave me for Christmas. It was too cold to go any where and my honey was home. Today was the perfect day to make them. I like to visit one of my favorite music sites, Pandora I love listening to Dean Martin, Frank Sinatra, and Sammy Davis Jr. I think I was born in the wrong time period. So here in my kitchen I was serenaded by fabulous men on Valentine’s Day and my husband popping in the kitchen to dance with me occasionally I made MY cinnamon rolls.
Ingredients:
Dough
1 qt whole milk
1 cup vegetable oil
1 cup sugar
2 pkgs (4-1/2 tsps) active dry yeast
9 cups  all-purpose flour
1 heaping tsp baking powder
1 scant tsp baking soda
1 TBSP salt

  • For the dough, heat the milk, vegetable oil, and sugar in a medium saucepan over medium heat; do not allow the mixture to boil.  Set aside and cool to lukewarm. 

  • Sprinkle the yeast on top and let it sit on the milk for 1 minute. (Make sure milk is lukewarm if its hot it will kill the yeast and it won't rise)

  • Add 8 cups of the flour, stir until just combined, cover with a clean kitchen towel, and set aside in a relatively warm place for 1 hour.  (I put mine in the microwave)

 
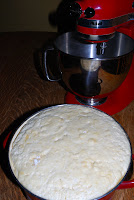
It has RISEN, Allelujah!!!
I don't have the best of luck when it comes to yeast!  I can't tell you how many times I have tried.  This was exciting and yes I did pray.


  • Remove the towel and add the baking powder, baking soda, salt, and the remaining 1 cup flour.  Stir thoroughly to combine.  Use the dough right away, or place in a mixing bowl and refrigerate for up to three days, punching down if it rises to the top of the bowl.
Filling:
2 cups melted butter, plus more as needed
1/4 cup ground cinnamon for sprinkling
2 cups sugar, plus more as needed.

  • To assemble the rolls, remove half the dough from the pan.  On a floured baking surface, roll the dough into a large rectangle, about 30x10 inches.
  • To make filling, pour 1 cup of melted butter over the surface of the dough.  Use your fingers to spread the butter evenly.
  • Generously sprinkle half of the ground cinnamon and I cup of sugar (I also added chopped walnuts)
  • Now, beginning at the end farthest from you, roll the rectangle tightly toward you.  Use both hands and work slowly, being careful to keep the roll tight.  Don't worry if the filling oozes as you work.
  • when you reach the end, pinch the seam together. 
  • Transfer to a cutting board and with a sharp knife, make 1-1/2 inch slices.  One log will produce 20-25 rolls.
  • Pour a couple of tablespoons of melted butter into the desired pie pans or baking dishes and swirl to coat.
  • Place the sliced rolls in the pans, being careful not to overcrowd them.
  • Repeat the rolling/sugar/butter process with the other half of the dough and more pans.


Preheat oven to 375 degrees F.  Cover the pans with a kitchen towel and set aside to rise on the countertop for a t least 20 minutes before baking.  Remove the towel and bake for 13 to 17 minutes, until golden brown.  Don't allow the rolls to become overly brown.

While the rolls are baking, make the icing.

Maple Icing
2 pounds powdered sugar
1/2 cup whole milk
6 TBS (3/4 stick) butter, melted
1/4 cup strongly brewed coffee
dash of salt
1 TBS maple flavoring or extract.
  • In a large bowl, whist together the powdered sugar, milk, butter, coffee and salt. 
  • Splash in maple flavoring,
  • Whisk until very smooth.  The icing should be thick but still pourable.
  • While the rolls are still warm, generously drizzle icing over the top. Be sure to get it all around the edges and over the top.

Notes:
  • Add finely chopped pecans to the rolls after sprinkling on the cinnamon and sugar.
  • Subsitute 8 Tbs. of orange marmalade and 1 cup brown sugar (per half batch of dough) for the cinnamon and white sugar, then substitute orange juice for the maple and coffee in the icing.
  • ( I used cinnamon, sugar, and chopped walnuts.  For the icing I used OJ)
  • Cinnamon rolls can be frozen in the pan, unbaked.  Just cover with foil after you place them in the pan but before they rise.  Then when your ready to bake, allow them to thaw and rise befoe baking , ice as directed. 
  • An easier method is simply freeze the baked, iced cinnamon rolls after they've cooled slightly.  Then just pull them out of freezer and warm them in a 250degree f oven for 15 min. 


I used 6 disposable aluminum pie plates.  I thought I was going to freeze them but when hubby saw them he asked if he could take them to work in the morning how could I say no. I was surprised he ate two! My husband very seldom eats sweets. I can’t wait to share them with my friends. Have a wonderful evening and Happy Valentine's Day!

Thursday, February 4, 2010

Homemade Girl Scout Samoa Bars

It has been awhile since I have  made anything sweet.  I was craving Samoa cookies from the Girl Scouts and  searching the web for a "knock off".  I finally found one courtesty of Nicole Weston of Baking Bites (http://www.bakingbites.com/) and by the way she has an awesome food blog.  She did a whole series on Girl Scout cookies and they all look amazing.  Fortunately for me she had a recipe for a Samoas Bar it wasn't as time consumming as making the cookies.  I made them and they were good but I believe I will be leaving the cookie making to the Girl Scouts.  It must of been a sign from above my neice ( yes, she is my cookie supplier) brought my order today!!! 
For the recipe just click on the url below.

Wednesday, January 27, 2010

Pasta Piselli


Growing up in an Italian household this was a winter staple and it was mom's quickest meal.  My mother, I love her to death has no concept of fast food or short cuts.  Everything she makes is a formal meal.  We all get together at mom and dad's at least once a month and you always know one you will never leave hungry, two my sister and I fight over who takes the leftovers home, three you will be there for a least a few hours so do not plan anything the rest of the day.  I made it for the first time ( I know shame on me) last night it was so cold here in Tennessee I wanted something quick, easy, and hot.   Now there a different variations of this recipe but this is the one I grew up with.

1 box Barilla ditalini pasta (cooked a dente)
chopped onions
1 cup of frozen peas or 1 can of peas

Cook pasta according to directions on the box.  While the pasta is cooking saute onions until soft then add peas cook together until pasta is done.  Drain only have the water from the pasta (some like it souper than others)  add onion and pea mixture to the pasta.  Sprinkle with parmesan cheese.  Enjoy.